Benefits Document Creator
FOR PARTNER ADMINISTRATORS
Benefits Document Creator
You can create Wrap, POP, HRA, FSA, and Qualified Transportation benefits documents using the Benefits Document Creator. You can access all of the plan documents for your company and your client’s in the Benefits Document Creator Library. From there, you can create a new document or edit an existing document.
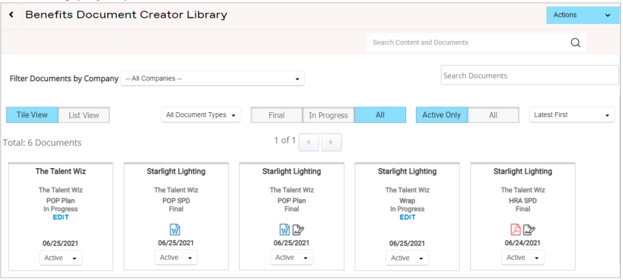
When you open the library, existing documents appear in a tile view. Documents are sorted by the most recently viewed or edited documents, but you can sort them from the latest to oldest document viewed or edited. You can also change the view to a list view.
Access a Benefits Document
You can search for an existing plan document by company or document name. You can limit your search by document type or progress, and search only active plans.
-
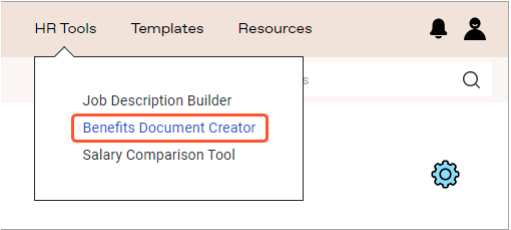
On the menu bar, hover over HR Tools, then select Benefits Document Creator. The library page opens in the tile view.
-
(Optional) Use one or more search options to find the document you want to access:

• To search by company, select the name of the company from the Filter Documents by Company dropdown menu.
• To change the view, select List View or Tile View.
• To search by document type, select a type from the All Document Types dropdown menu.
• To limit your search to only active documents, select Active Only.
• To sort the list, select either Latest First or Oldest First.
Create a Benefits Document
The document creator walks you through all of the steps needed to create a benefits document. You can exit the document creator at any time and the system will save the document so you can continue later.
Tips and explanations about documents are available on each page to help you learn more about the information you need to provide. Select the question mark ( ) icon next to any question.
For more information about specific plan documents, go to the Resource Center at Actions > Resources.
-
On the menu bar, hover over HR Tools and select Benefits Document Creator.
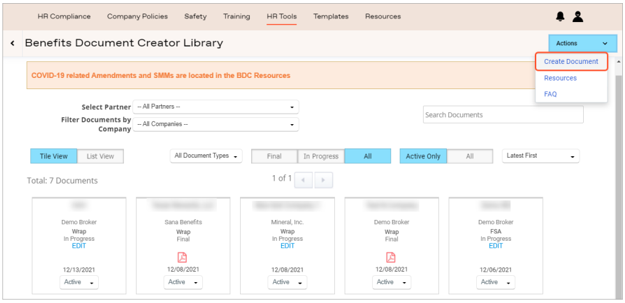
The New Document page opens and lists the companies you have administrative access to.
2. Find the company you want to create a document for.
3. Under the Actions column, select Continue To Create Document. The company’s information appears.
4. (Optional) If needed, you can edit some of the company information from here. Select Actions > Edit Company.
Note: You cannot change the Company Name or its address.
5. Actions > Create Document. The New Document Settings page opens and shows the company’s contact information.
6. From the Document Type dropdown menu, select the type of document you want to create.
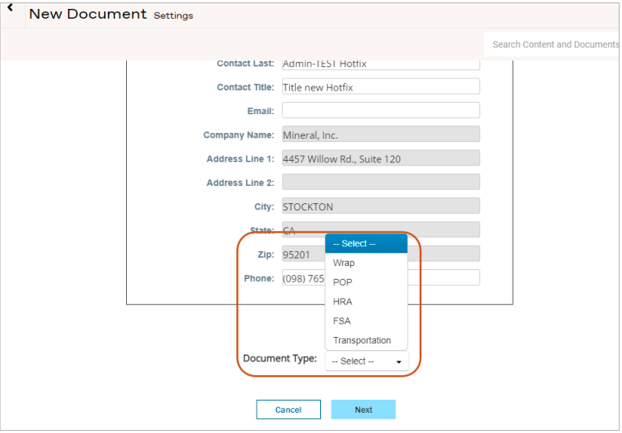
Note: Select the question mark ( ) icon to get tips and explanations about questions.
7. Select Next. A page opens where you can identify who is preparing the document. The information is optional and used only for tracking purposes.
8. (Optional) Enter the contact information for the person completing the document. Select Next.
9. Complete the information on each page of the document creator. Then, do one of the following:
• Select Save & Exit to close the document creator. You may return to your In Progress document later.
• Select Finish to complete the document.
Note: If you receive an “Incomplete” message, you must provide the missing information before you can finish the document. To learn how, see Incomplete Documents.
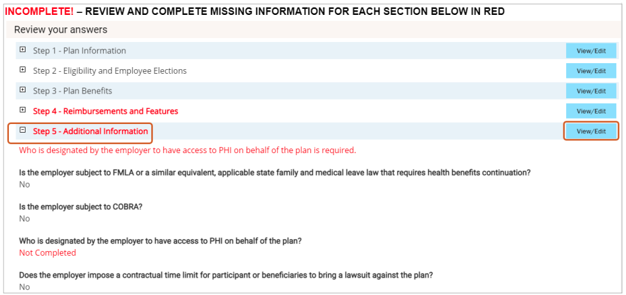
Incomplete Documents
If you reach the last page of the document creator and receive an incomplete message, you must provide missing information for the sections in red before you can finish the document.
1. Select the Plus (+) button next to each step in red. A list of the missing information appears.
-
Select Next to finish the document.
Update or Inactivate a Benefits Document
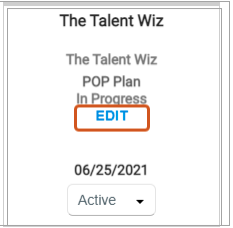
1. Go to the Benefits Document Creator Library, find the document you want to update.
2. To edit, select Edit on the document’s tile.
-
To make the document inactive, select the Active dropdown menu, then select Inactive.